

With file sizes forever increasing, the need for bigger, better, and faster storage devices never ends. The good news is that it’s incredibly easy to install an M.2 SSD, which remains the latest solid-state drive form factor. You’ll just need to make sure everything’s compatible first.
Much like its blocky predecessors, M.2 models are plug-and-play, just without the wire. So long as you have the right model, it’s as easy as sliding it into the correct slot and pinning it down.
However, not all motherboards are built equal. You need to ensure you get the correct type of M.2 drives, including PCIe (Peripheral Component Interconnect Express) generation and size.
1. Motherboard compatibility
NVMe vs. SATA
Selecting the best SSD for the job entirely depends on which motherboard you own. M.2 is the flat format with NAND arranged on top of the chip, but there are two different types: SATA and NVMe.
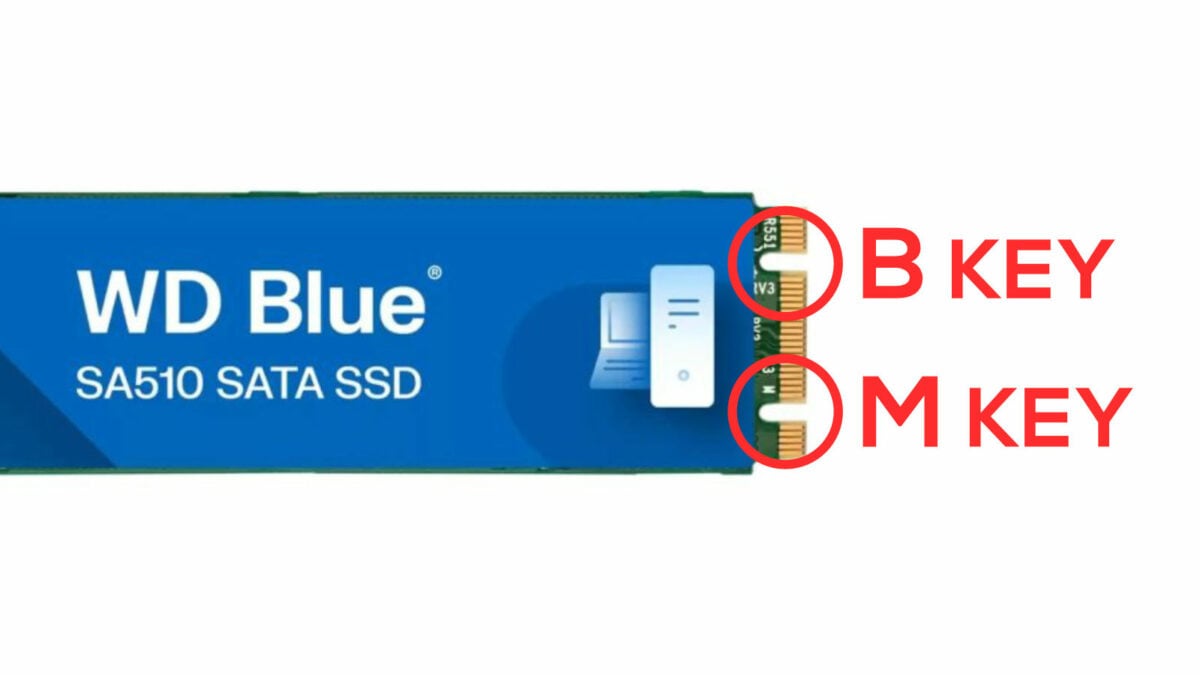
SATA is an older interface, usually characterised by slower speeds, lower capacities, and cheaper prices. You don’t see too many of them around anymore but the ones that do either feature a B-key or an B+M key.
NVMe is the gold standard with faster speeds and higher capacities, but prices will vary. Costs haven’t been particularly kind over the past year. If you’re upgrading in 2024, chances are you’ll get an NVMe, which uses an M key and, in rare instances, M+B.
PCIe generation
The beauty of that M key is that it uses the PCIe x4 bus for quicker speeds. There are currently three generations of NVMe drives to choose from, each faster than its predecessor. A quick rule of thumb is that each iteration doubles its theoretical speed.
| PCIe 3.0/3.1 | PCIe 4.0/4.1 | PCIe 5.0 | |
|---|---|---|---|
| x1 | 1GB/s | 2GB/s | 4GB/s |
| x2 | 2GB/s | 4GB/s | 8GB/s |
| x4 | 4GB/s | 8GB/s | 16GB/s |
It’s not quite one-for-one in terms of real-world performance. Gen 3 topped at around 3,500MB/s read and write speeds, Gen 4 increased this to 7,000MB/s, and Gen 5 is capable of reaching 14,500MB/s read speeds and 12,700MB/s write.
All generations are forward and backwards-compatible, but speeds are limited to the weakest link in the chain. You can plug a Gen 5 drive into a Gen 4 slot with the idea of upgrading to a faster motherboard in the future, but you will be limited to Gen 4 speeds. Do note that Gen 5 drives also get hotter and some require extra cooling.
M.2 size
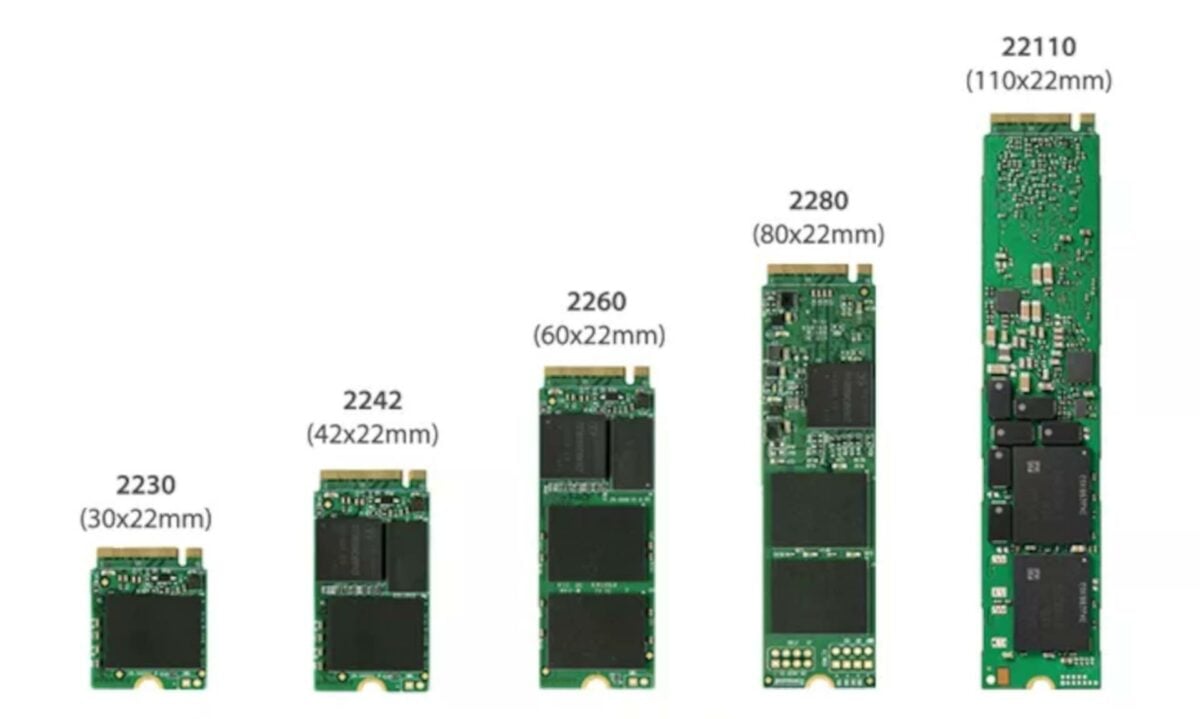
M.2 drives come in five different sizes ranging from 30mm to 110mm long. The most common is the 80mm long 2280 format, but 2230 devices like Crucial P310 are ideal for gaming handhelds and small form factor PCs. Manufacturers will tell you which size your motherboard supports in the manual. Sticking with official compatibility is the easiest way to install an M.2.
2. Preparation
It’s best to choose where you’re going to place your M.2 drive before messing around under the hood. Usually, your motherboard’s instructions have a diagram showing you where each slot is so you can pick ahead of time. Don’t worry if you’ve lost the physical copy. You can usually find a digital version in the support section of the product page.
One thing to note is bandwidth. Some M.2 ports share the same bandwidth as your SATA and expansion slots. Using such M.2 slots could disable certain ports or halve the speed of others, including your graphics card. Your manual should tell you all you need to know, but usually, the higher the slot, the more dedicated bandwidth it has, while physically lower ones tend to share.
3. Install your M.2 SSD
Safety first! Start by turning off your PC.
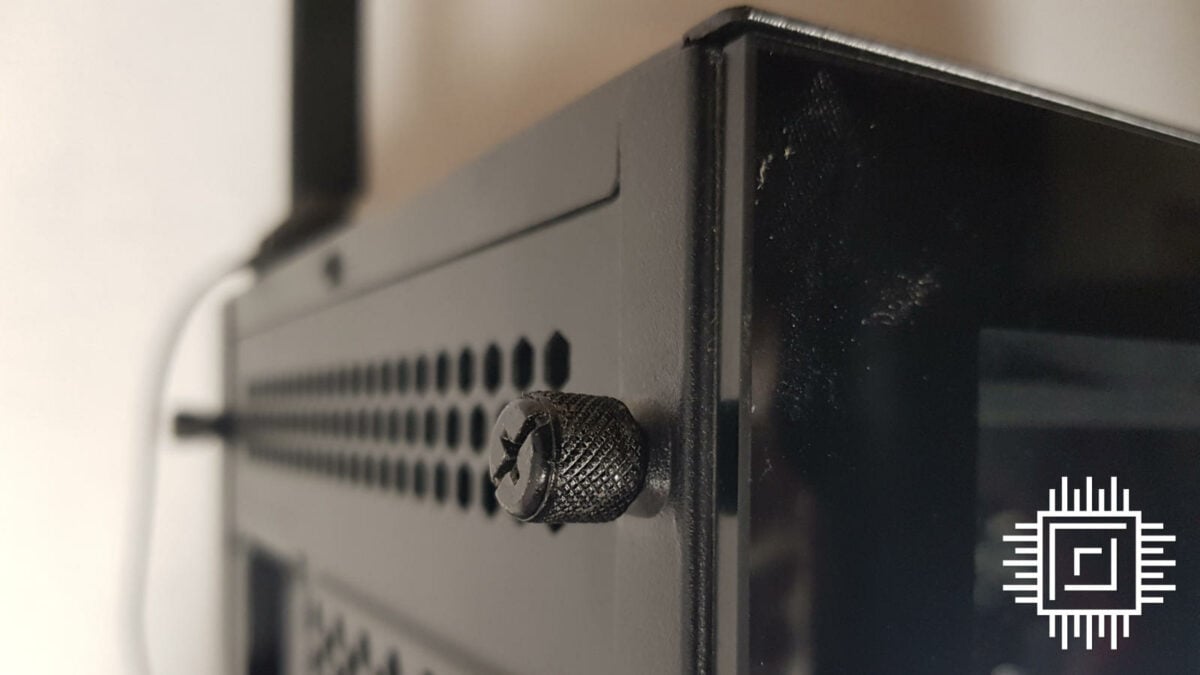
Next, either turn off your PSU using the switch on its back (pictured below) or remove the power cord. This may sound unnecessary, but motherboards keep some power running even while the PC is off to allow features like USB charging and Wake-on-LAN to work.
Press the power button on your case a few times to cycle out any leftover electricity.

Open your computer’s side panel by unscrewing it and sliding it towards the rear. This can differ from chassis to chassis, as some feature push-button latches and others slide up, but the process doesn’t differ too much.
Now, you should have direct access to the components.
If you’ve chosen to use a port that’s beneath your graphics card, you’ll need to remove your GPU first.
To do so, start by removing the power cables plus any HDMI or DisplayPort connected to the graphics card.
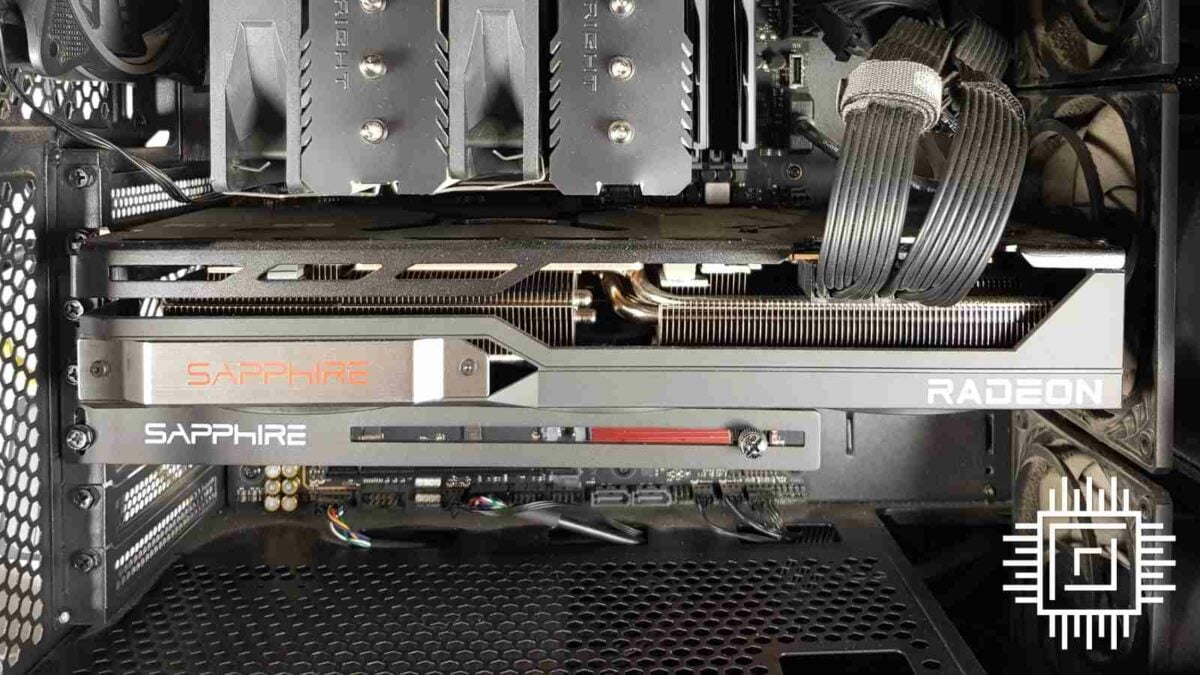
Remove the screws holding the card to the chassis. Their number may vary depending on the model. In my case, I have a Sapphire RX 7900 XT that comes with a GPU holder to help reduce the sag. So, four screws in total.
After removing the screws, you will need to unlock the graphics card from the PCIe slot. Reaching the latch holding the GPU in place can be quite awkward, as it’s situated on the right edge, directly behind the bulkiest models.
While it might seem like a good idea to use something thinner to push down, you risk slipping and stabbing your motherboard or breaking the clip. If you struggle to use your finger, I recommend removing the CPU cooler first.
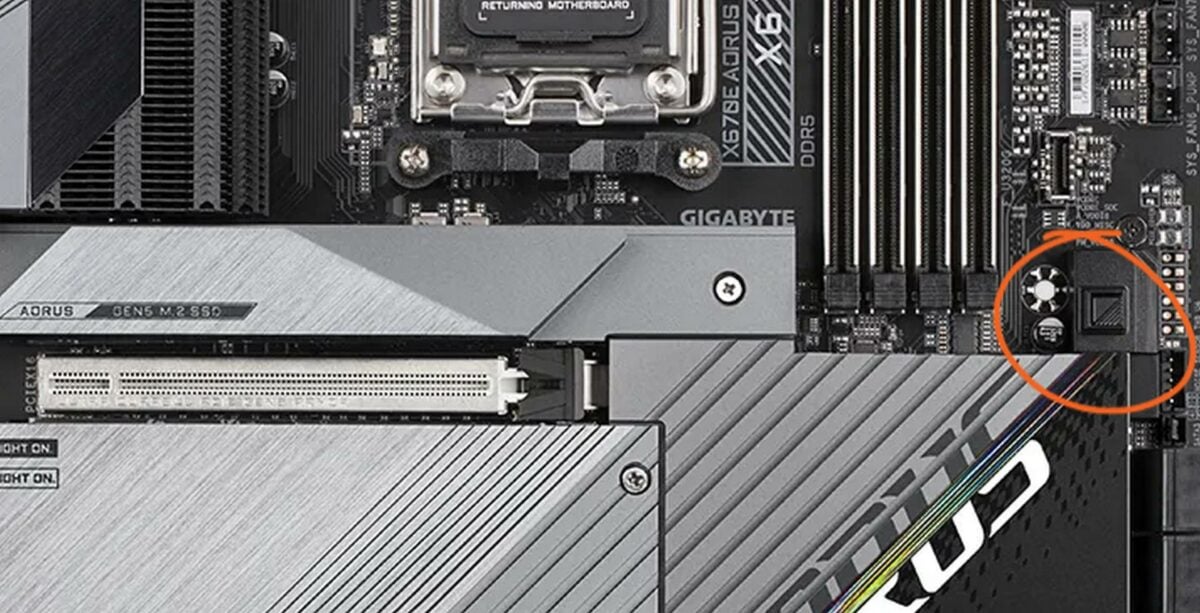
Note that some motherboards, like the Gigabyte X670E Aorus Master, have a dedicated mechanism called EZ-Latch Plus that easily unlocks the card. See the picture below.
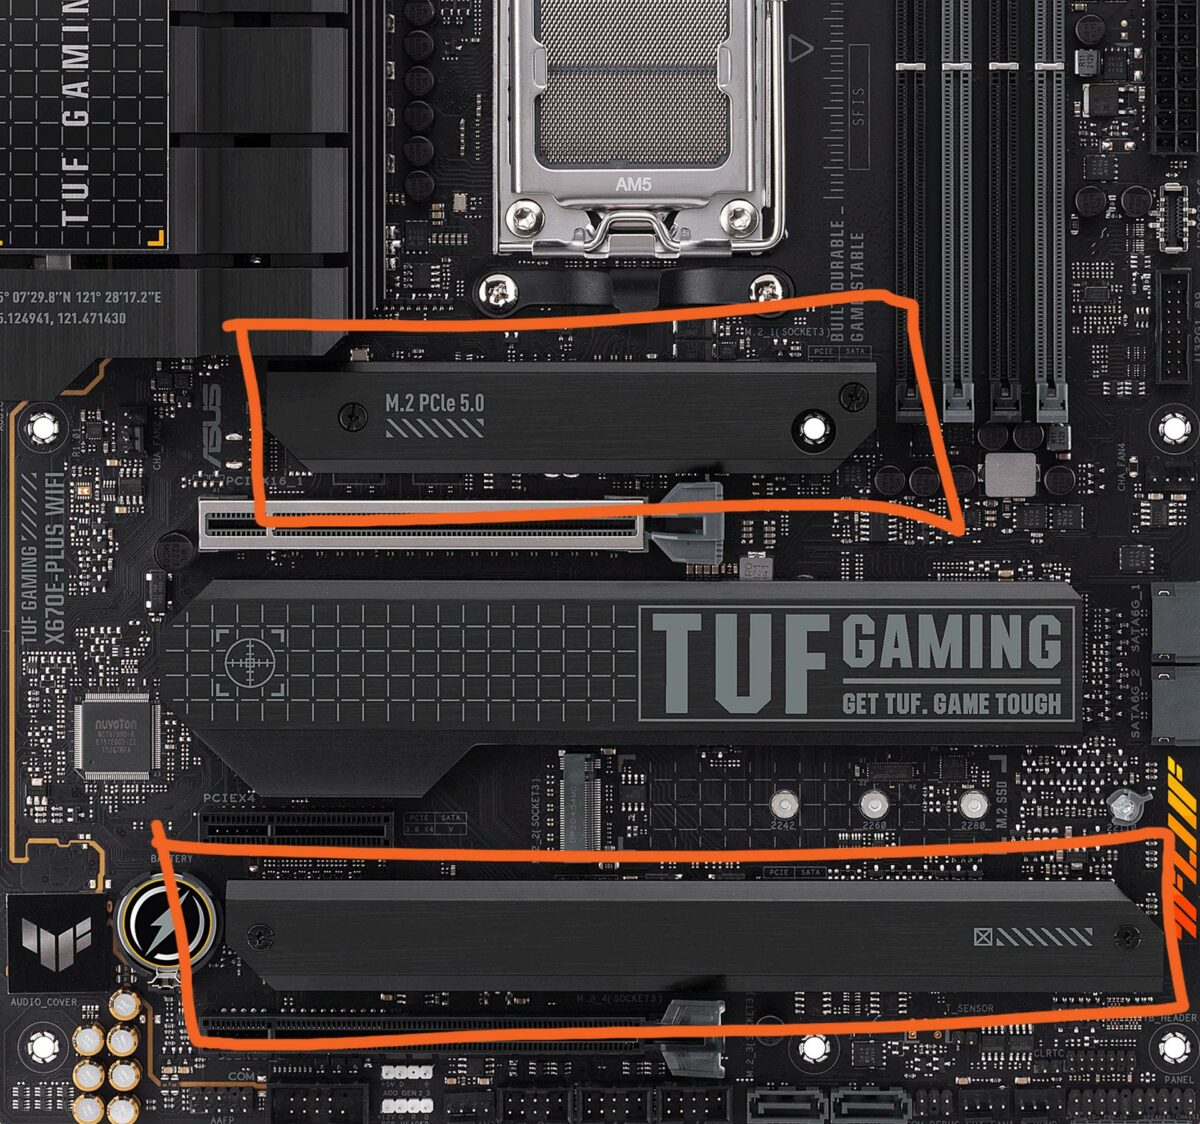
Due to the potential difficulties coming with graphics card removal, I recommend using secondary M.2 slots if they’re available. For example, my Asus TUF Gaming X670E Plus WiFi has four M.2 slots. Two are located below the graphics card, and two are easily accessible without having to remove anything. Plus, chances are if you have a recent platform, your secondary M.2 slots are Gen 4, i.e. fast enough for most drives. So, you are not losing any performance unless you have one of those fancy Gen 5 SSDs. Just keep in mind that, depending on the motherboard model, using one slot or another may disable some SATA ports, as mentioned earlier.
Now that we have enough room, it’s time to install the SSD.
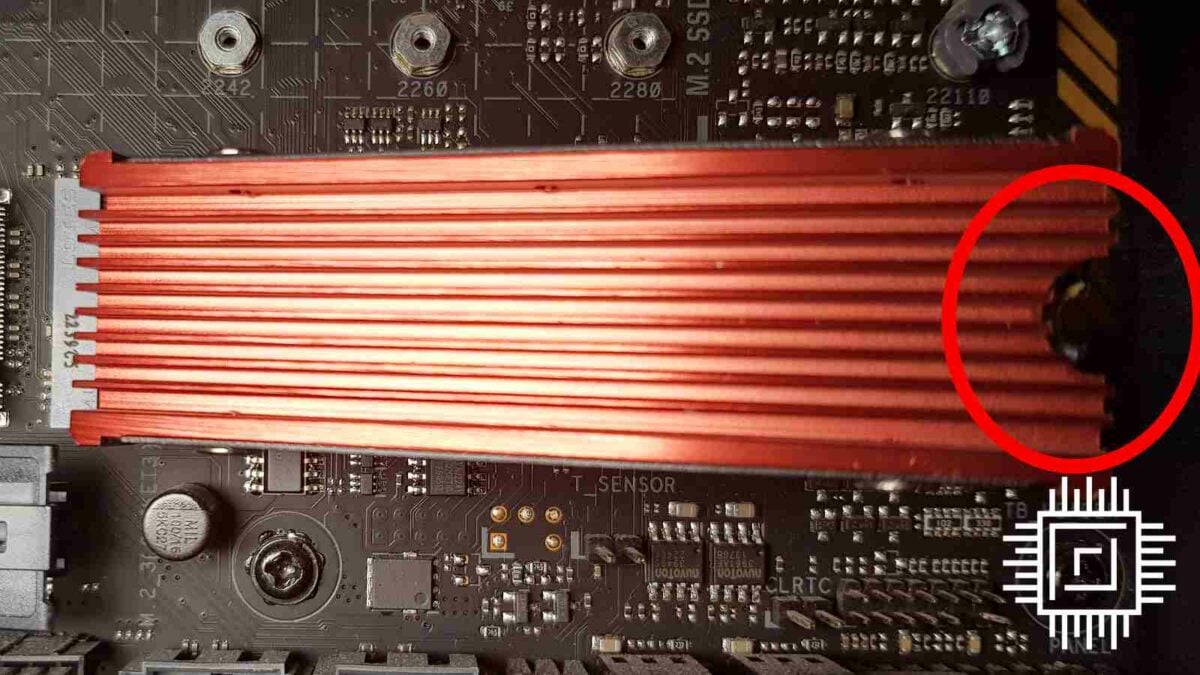
If your motherboard has a type of SSD heatsink on top of the slot you wish to use, unscrew it and remove it. In my case, it would be the top one with the PCIe 5.0 marking.
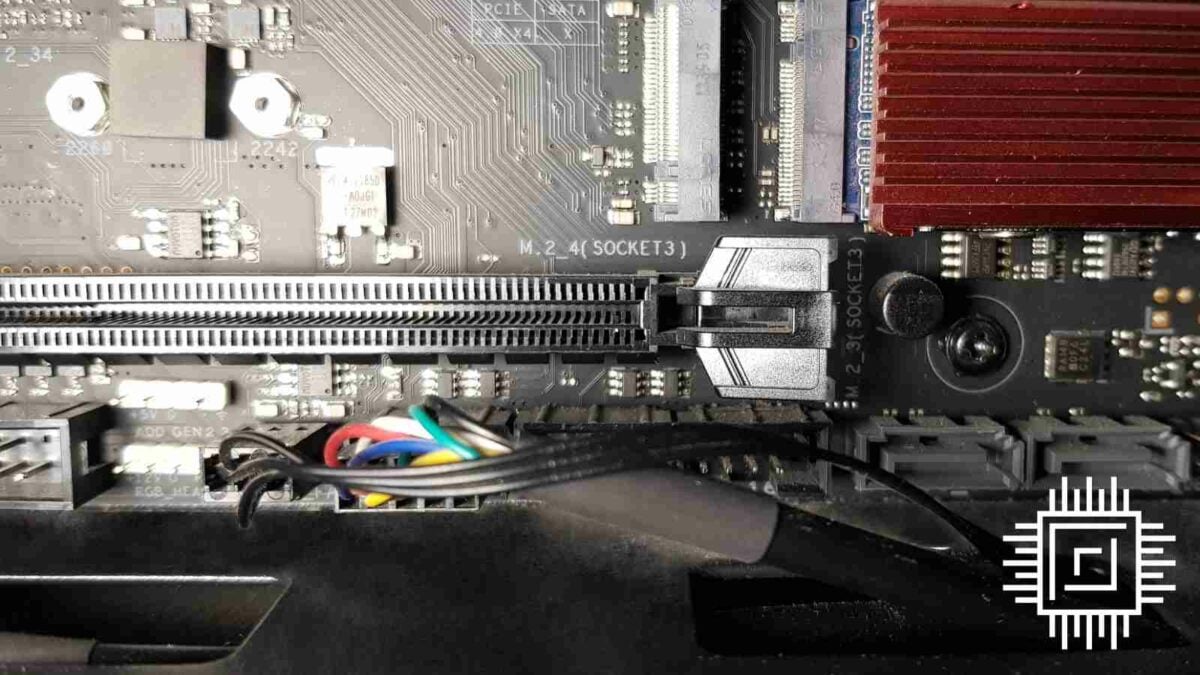
Locate the little notch on your SSD and position it correctly in front of the M.2 slot. Push the SSD inside the slot at a small angle (about 15° is good enough), then lower it into the latch and secure it by turning the latch.
If your M.2 slot uses a screw instead of a latch, simply remove the screw, put the SSD down, then reinstall the screw.
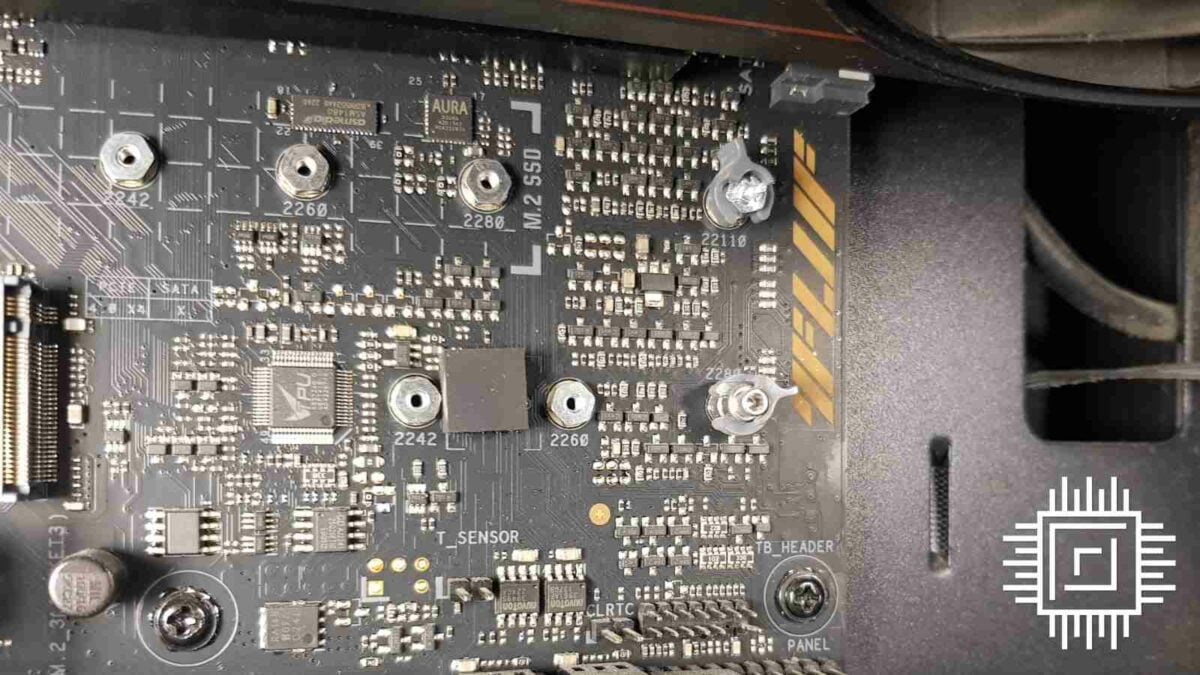
Note that some motherboards may come with this latch/screw point installed in a different position, or your SSD may have a different length. In this case, just relocate the latch to the adequate position. It should unscrew easily.
Here, you have two ways, depending on whether your SSD has a heatsink or not. If it has one, then you won’t need to install the motherboard heatsink back. And if it’s a bare SSD, then peel off the protective film from the motherboard heatsink before installing it on top of the SSD and screwing everything.
If both your motherboard and SSD don’t have any kind of M.2 heatsink, it’s OK; this means your SSD doesn’t get hot enough to require advanced cooling.
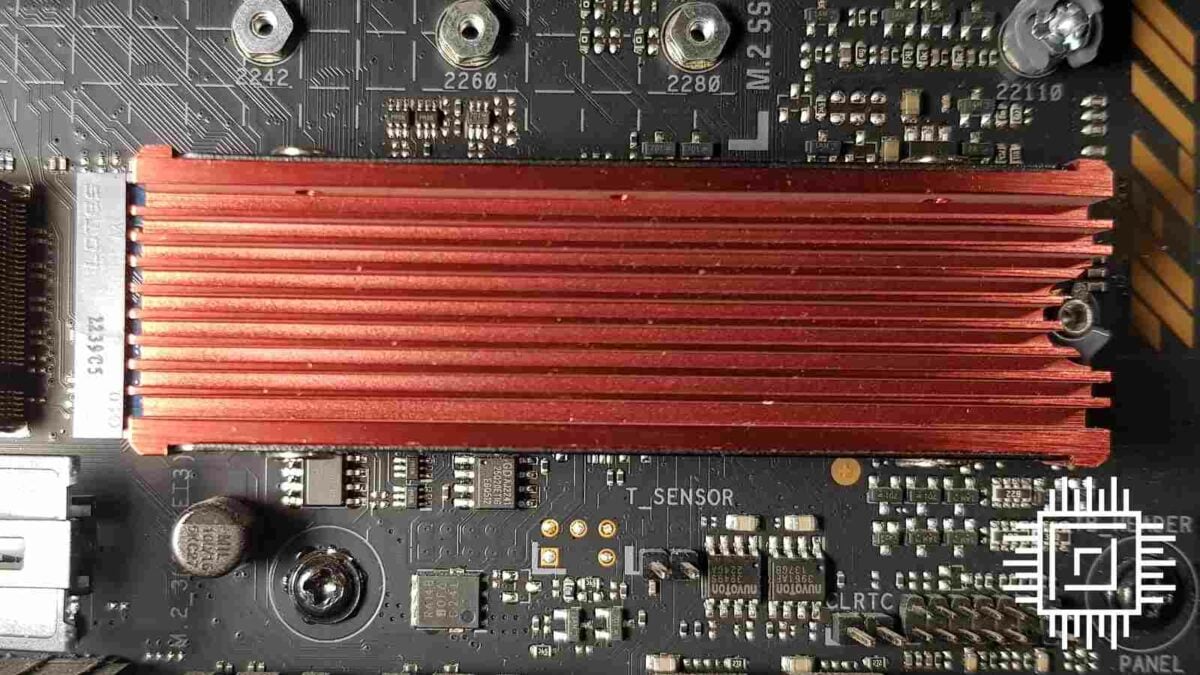
After securing the SSD in place, you should have something like this.
Now all that is left is to put your graphics card back the same way you took it out. Just don’t forget to reinstall its power and video cables. If you used an accessible M.2 slot, then you saved yourself the hassle.
Close your PC side panel and flick the PSU power button into the ON position, then start your PC.
4. Activating your SSD
Open your Windows file explorer and see if the drive shows up there.
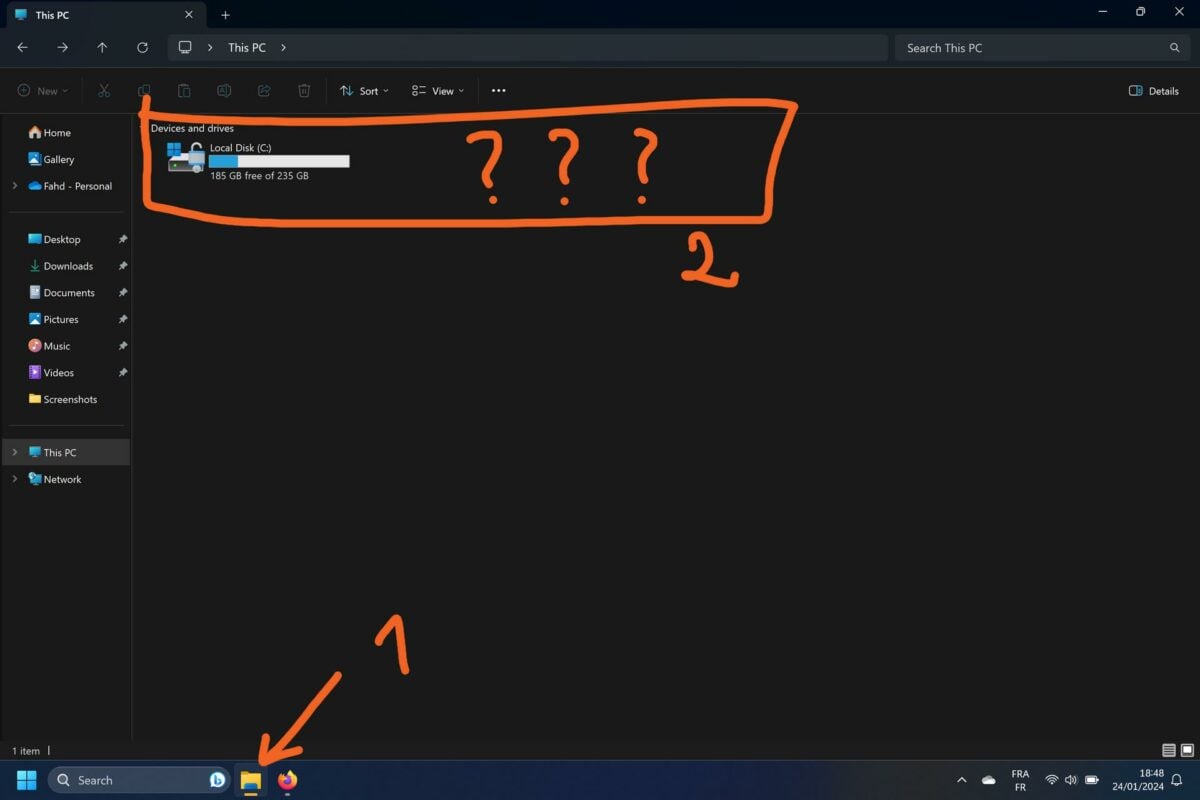
If yes, then you are all good.
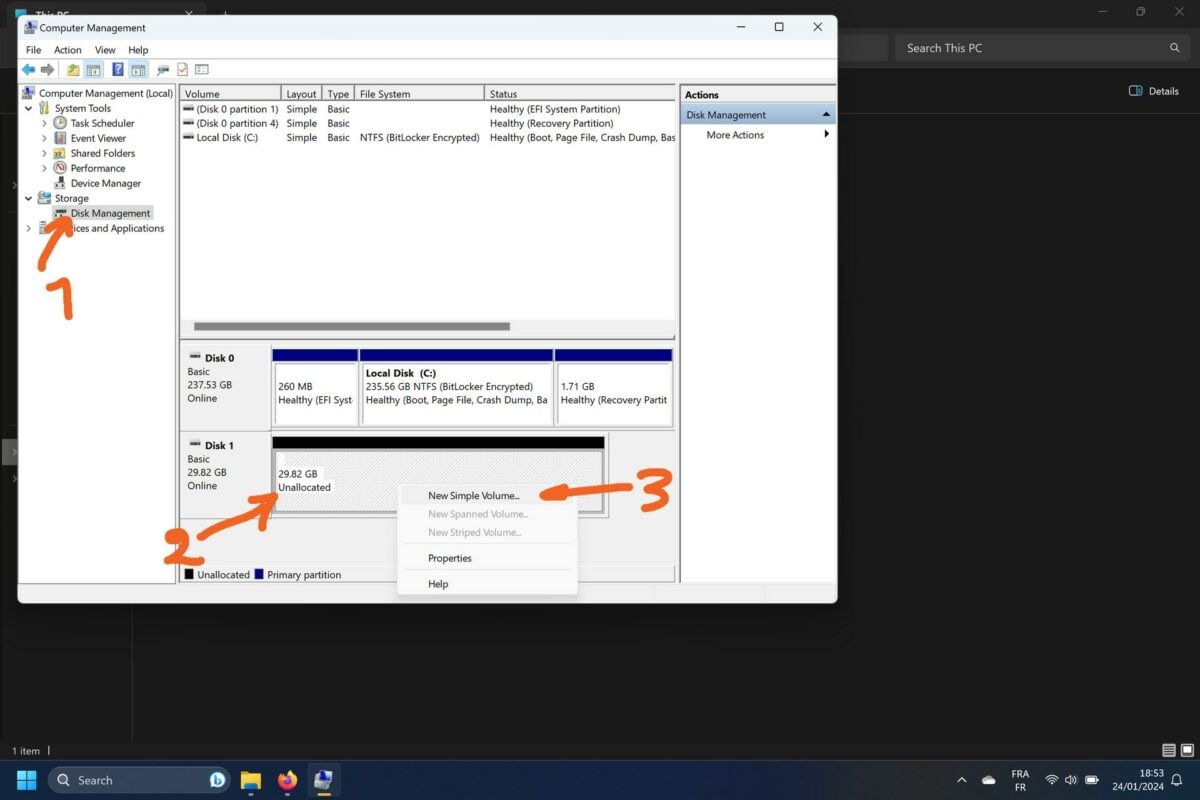
If not, then type “Manage” in Windows search bar and select Computer Management.

In this new window, go to Disk Management on the left side.
Find the disk that is marked as Unallocated. It should also have a black bar.
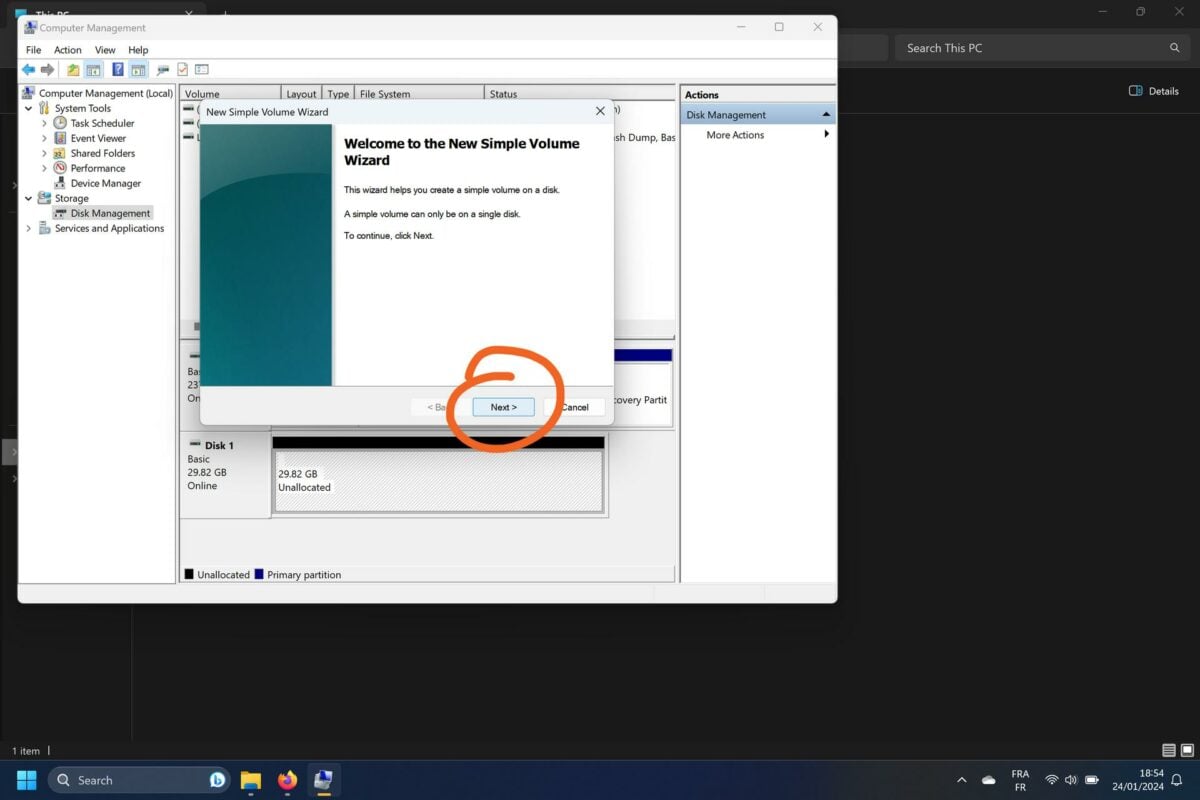
Right-click on it and choose New Simple Volume.
Click Next.
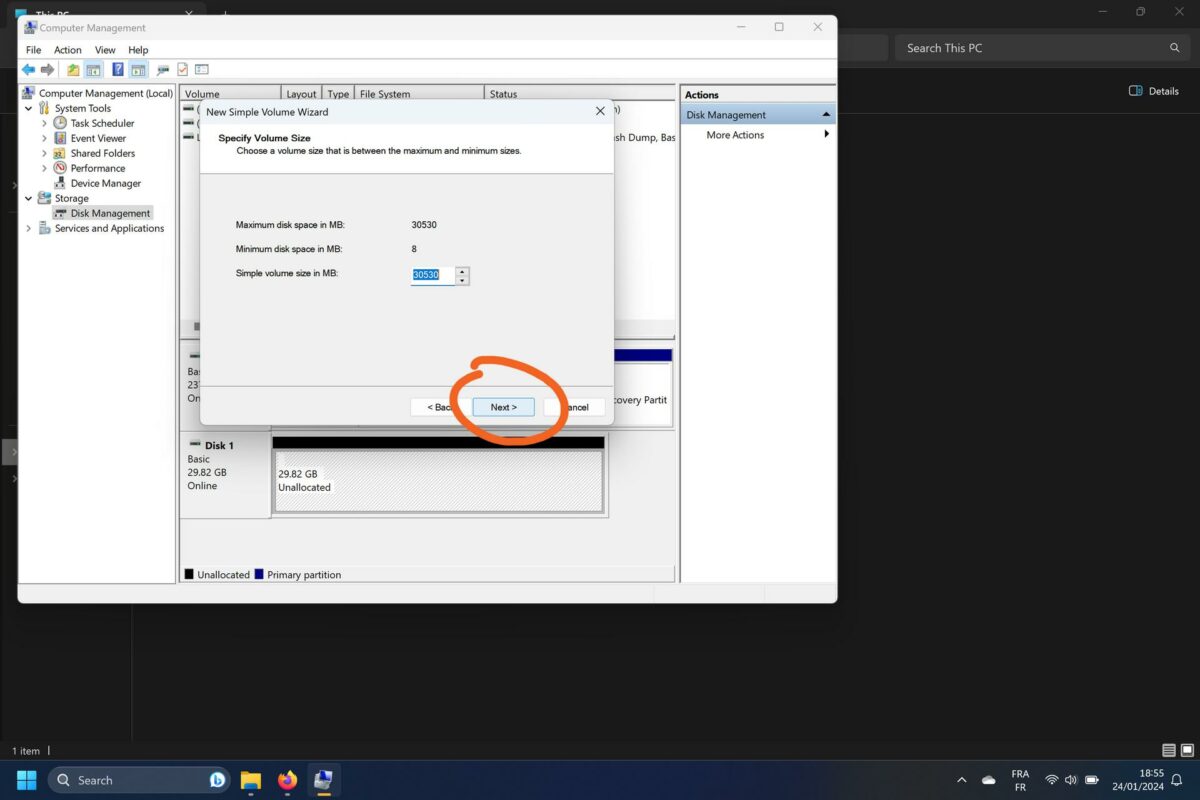
Again, Next.
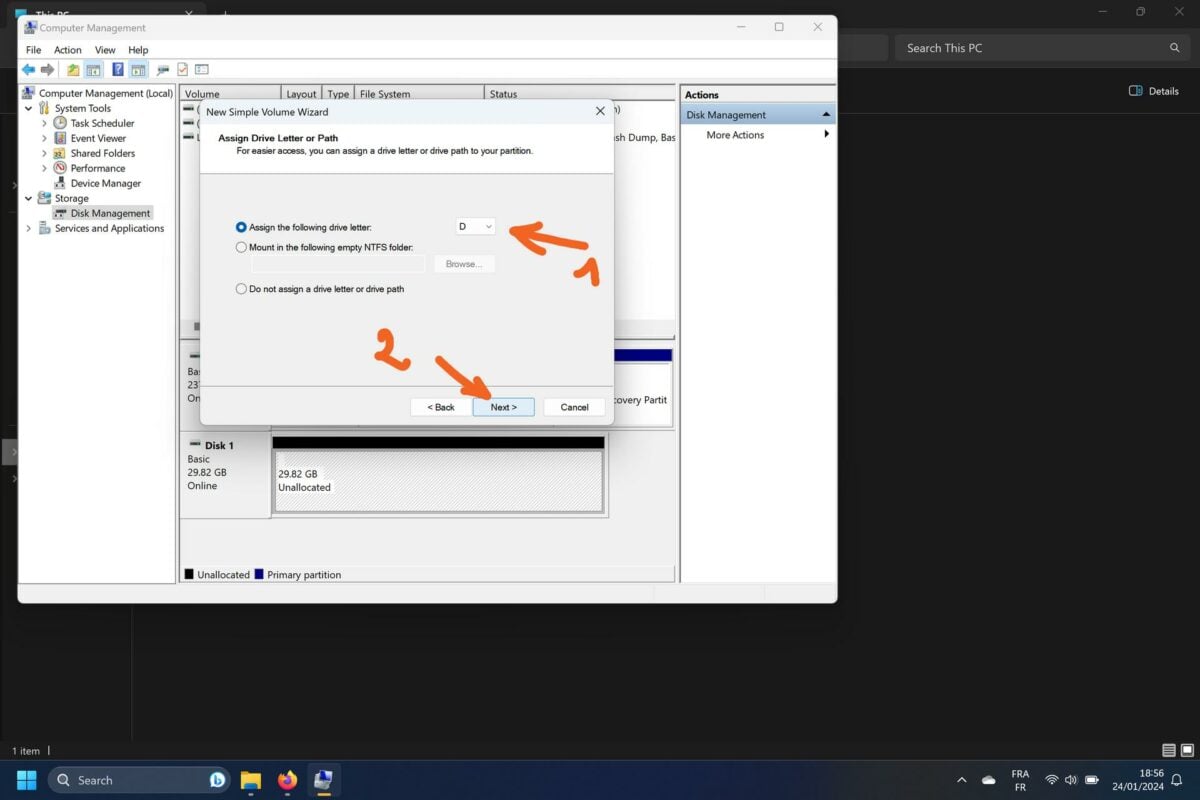
Choose a letter if you want, or leave it as is, then click Next.
Choose a File system and Volume label or leave them as is, then click Next. Just make sure Perform a quick format is checked, otherwise, the process may take longer to finish.
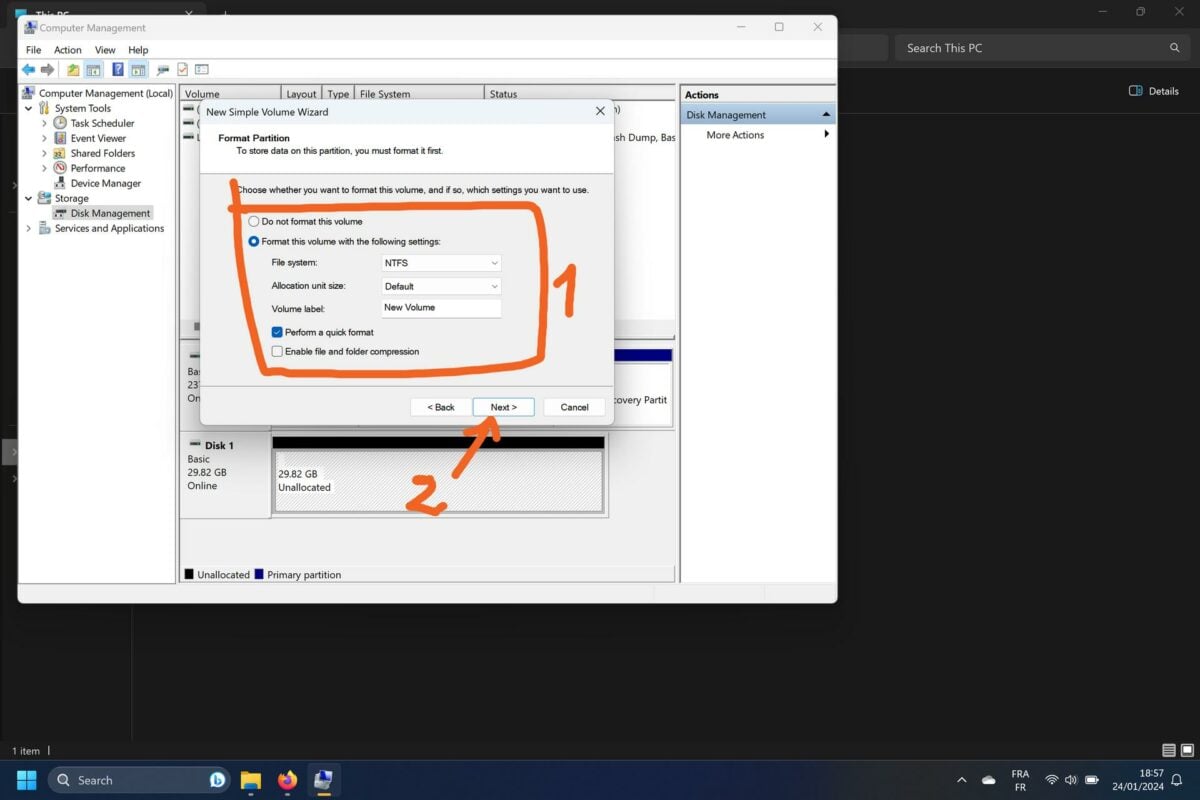
Press Finish.
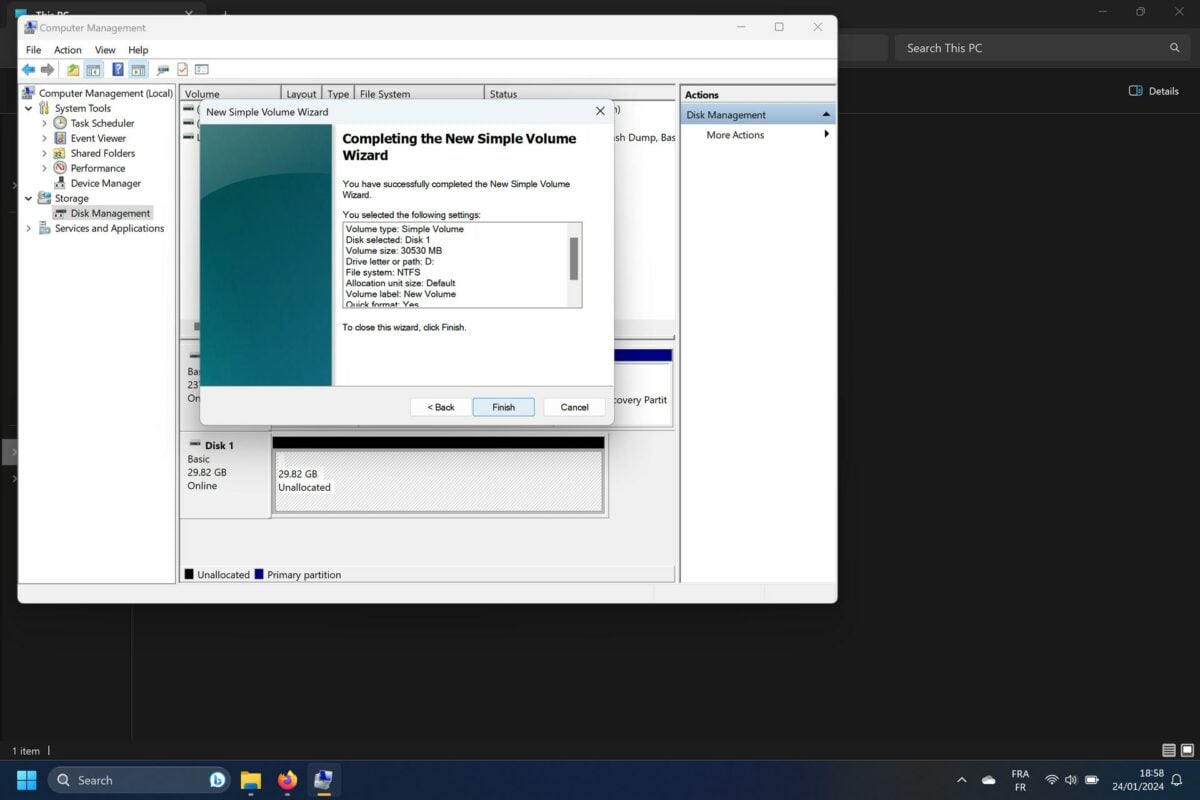
Give it a couple of seconds to format the drive, then the previously black bar should become blue. You may also see a notification popping up announcing a new drive detection.
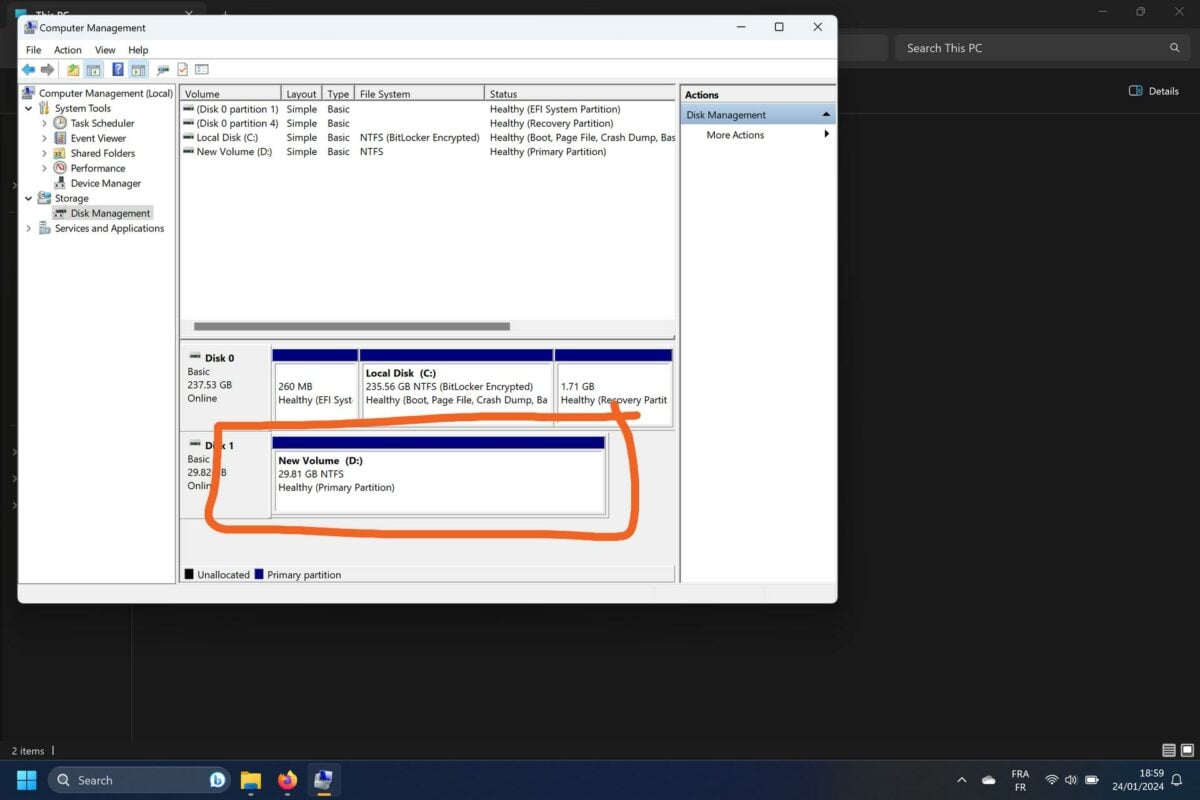
Now you should see and have access to your drive. Good job.