Installing Windows 11 without being connected to the Internet is no longer as simple as pulling the cable. Microsoft’s insistence on official accounts is such that users are required to be online during setup, yet if you have one eye on security or privacy, fear not, this step-by-step guide will show you the easiest way to achieve offline installation.
Backup your drivers
Before we start, a quick trick that may prevent headaches further down the line: backup your drivers before reinstalling / formatting your machine. Especially important for pre-built PCs, where it may be harder to find the manufacturer’s website / drivers for individual parts.
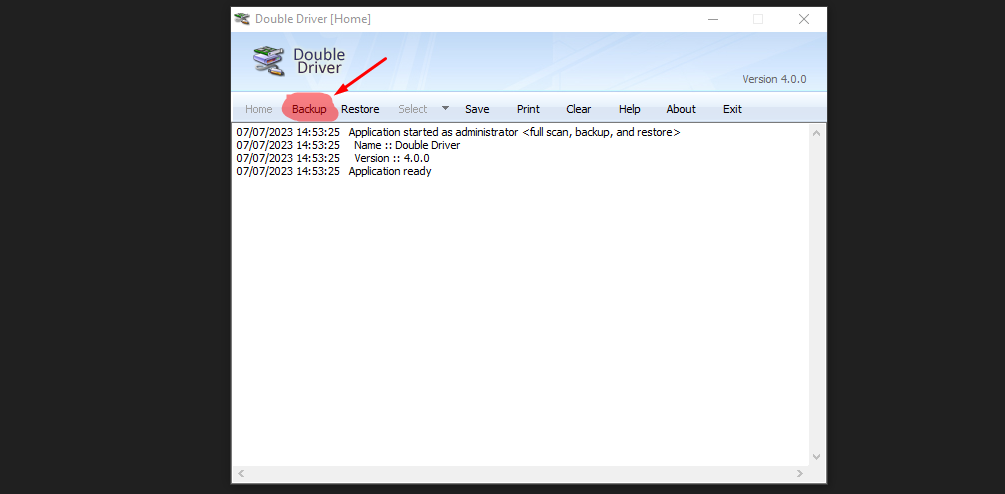
Many apps can do the job, but for our tutorial, we’ve opted for tried-and-tested Double Driver. After downloading the software, extract the files where you like, and run the executable (dd.exe) as an administrator (right-click and select ‘Run as administrator’). Now press ‘Backup’.
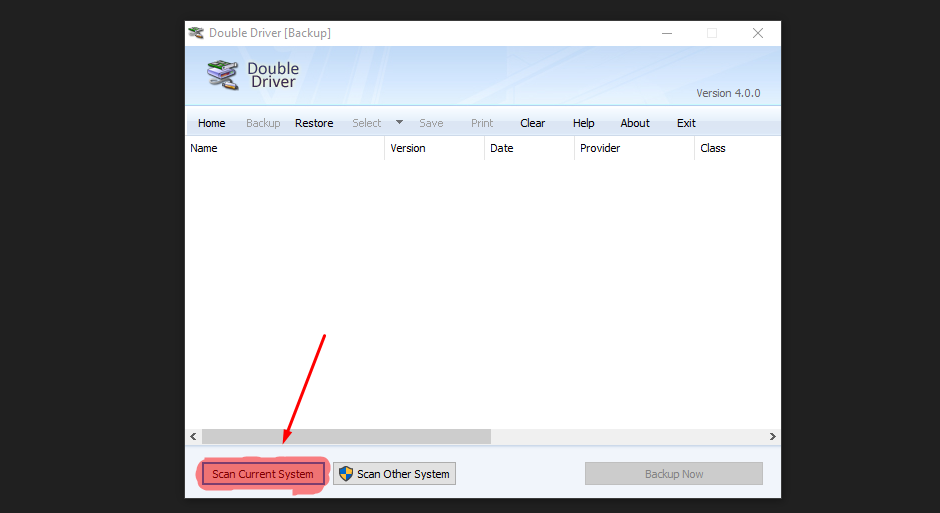
Choose ‘Scan Current System’ and select any drivers you would like to keep, or simply select all to be safe. Even if this may inflate the size of said backup into multi-gigabyte territory, it’s better to be safe than sorry.
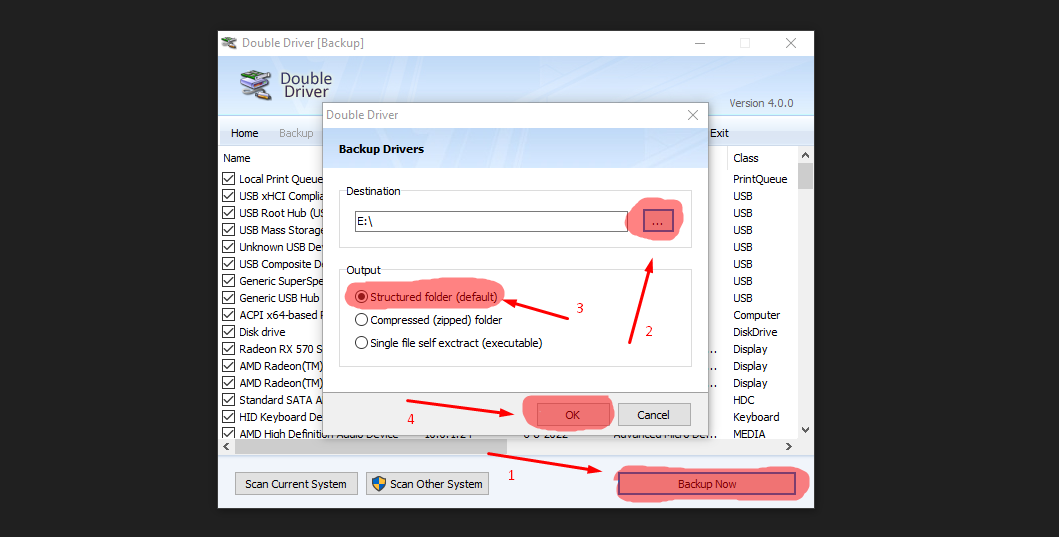
Click on ‘Backup Now’, then select where you want to save the files. We recommend leaving output as ‘Structured folder,’ as this allows you to manually find and install a driver using Windows Device Manager.
This is merely a precautionary step in case some components aren’t correctly recognised, the odds of which are increased if you plan to keep using Windows 11 offline after installation.
Make a bootable USB drive
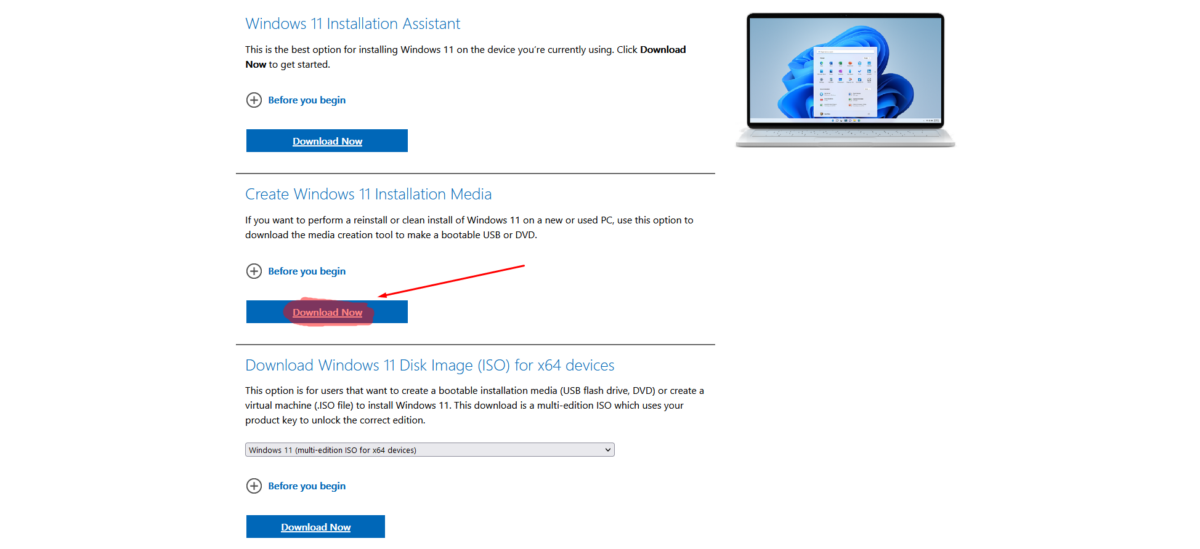
Ready to wipe the slate clean and start afresh? First, you need to get an ISO of the Windows installer on a compatible USB drive. The simplest method is to download Microsoft’s official Media Creation Tool, which we’ll be using for simplicity’s sake.
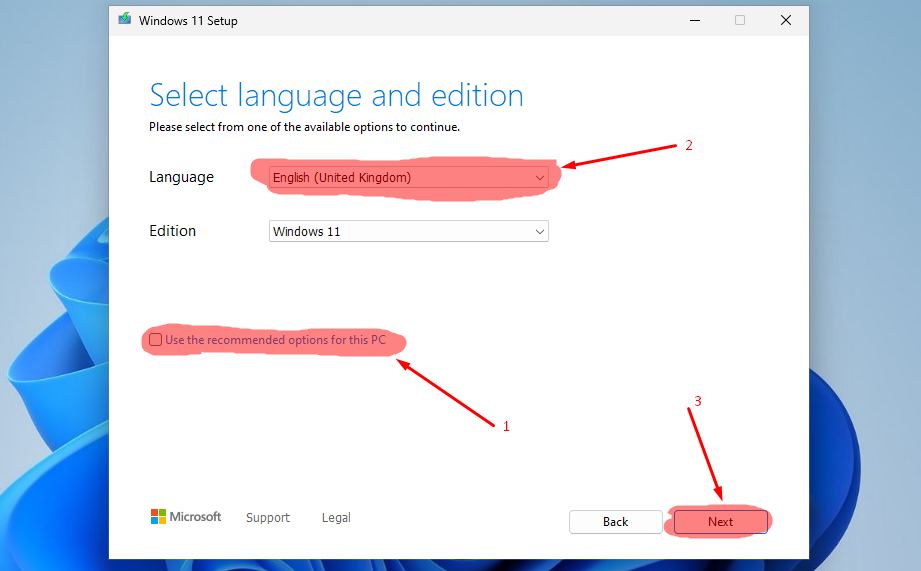
Download and run the app as an administrator. After accepting the licence agreement, uncheck ‘Use the recommended options for this PC’ and choose your desired language. Click next.
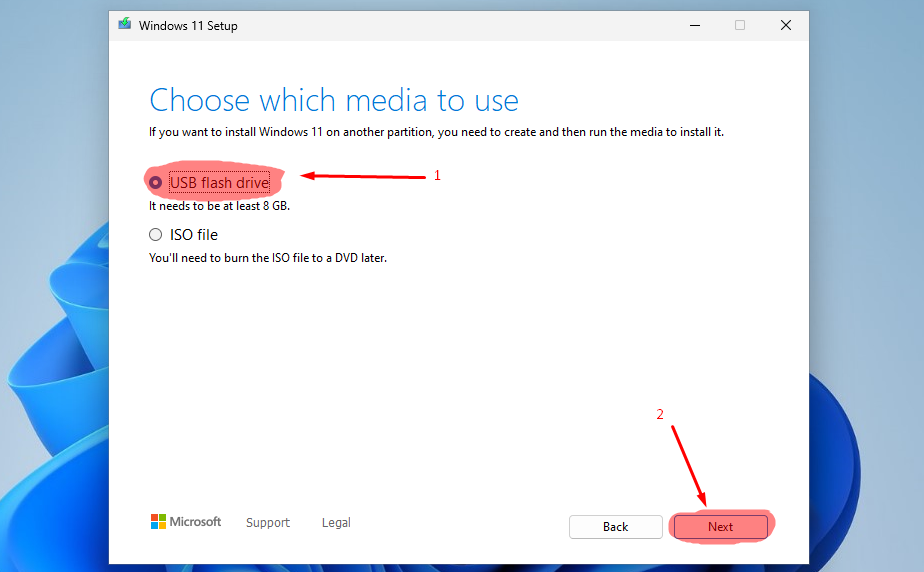
Select ‘USB flash drive’ and click next.
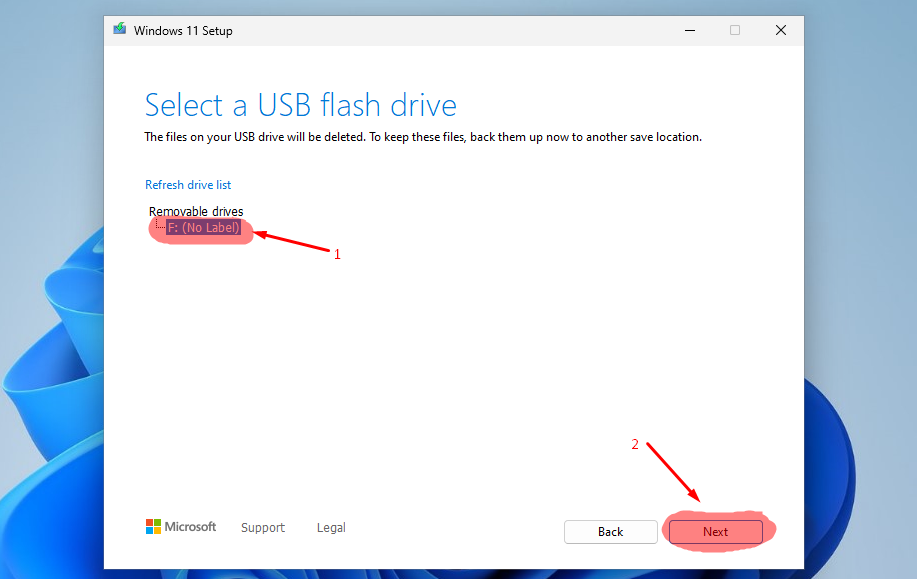
Select the drive onto which you would like to copy the Windows Installer – it must have at least 8GB of space – and click next. Be mindful not to use the USB stick containing your driver backups, as the drive will be formatted as part of the process! Wait until the download / preparation completes. This may take several minutes, depending on the speed of your Internet connection.
Install Windows
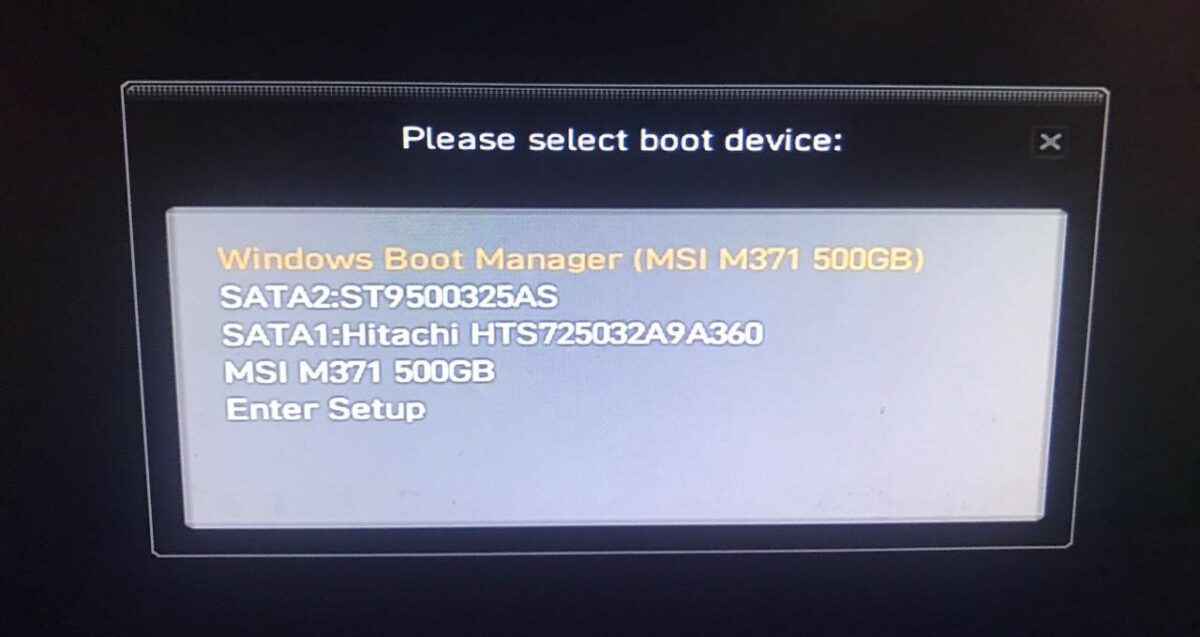
Now for the installation. Turn on the PC on which you want to install Windows 11 and enter the boot device selection menu. This can be achieved by pressing the relevant key during the boot sequence – it’s usually F10/F12/Esc, but check this list if you’re unsure – or alternatively enter system BIOS and manually select the USB drive as boot device.
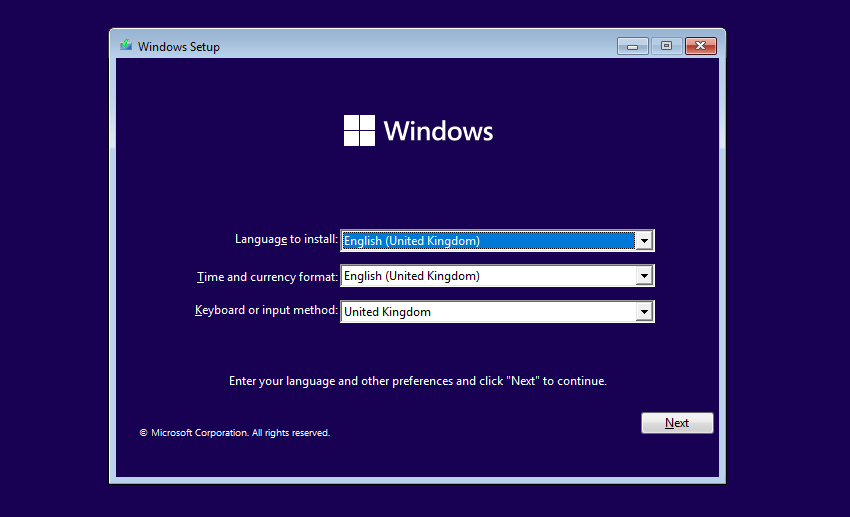
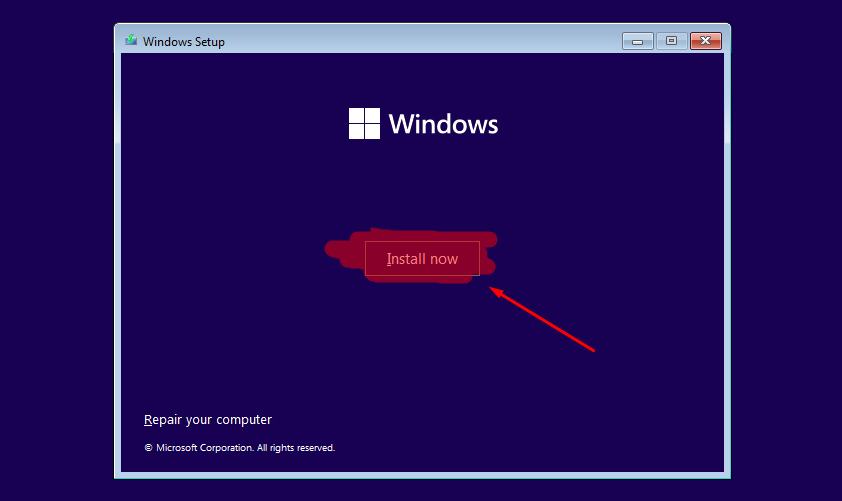
Upon boot, the installation wizard will begin with a set of regional preferences. Choose the correct language and input method, and then Install now.

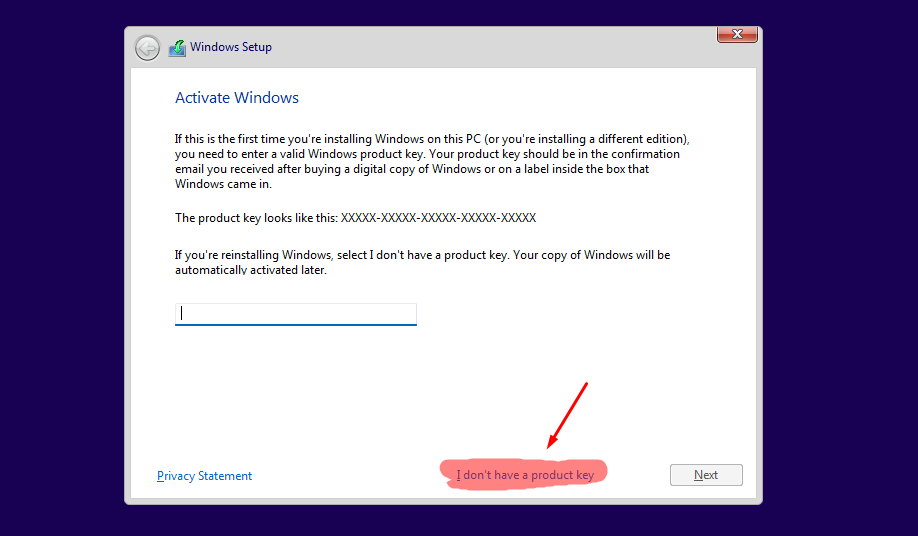
Do not be alarmed by the Activate Windows prompt. If you have a key pop it in, and if you’re merely reinstalling Windows, simply select ‘I don’t have a product key’ and the software will automatically activate upon connection to the web.
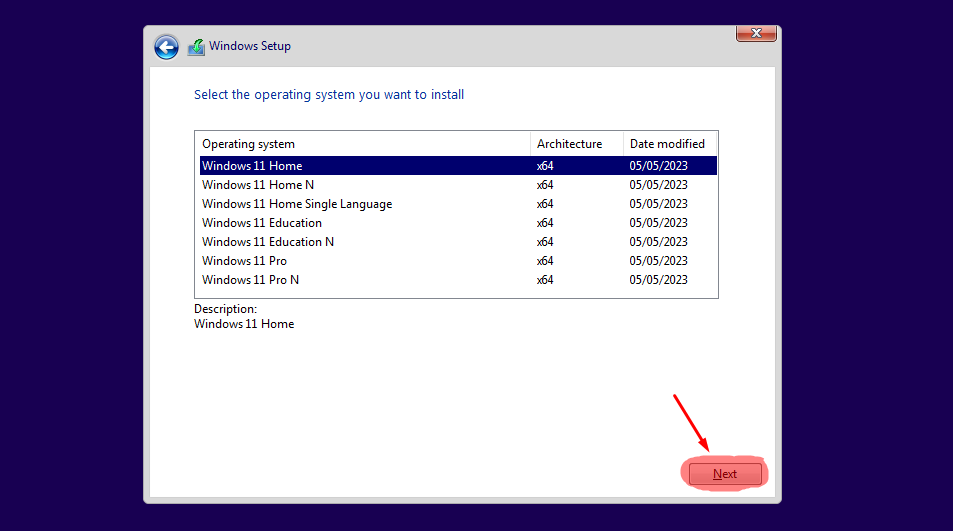
On the next step choose the relevant version of the operating system you want to install. For Windows 10 Home users, that’s Windows 11 Home, believe it or not.
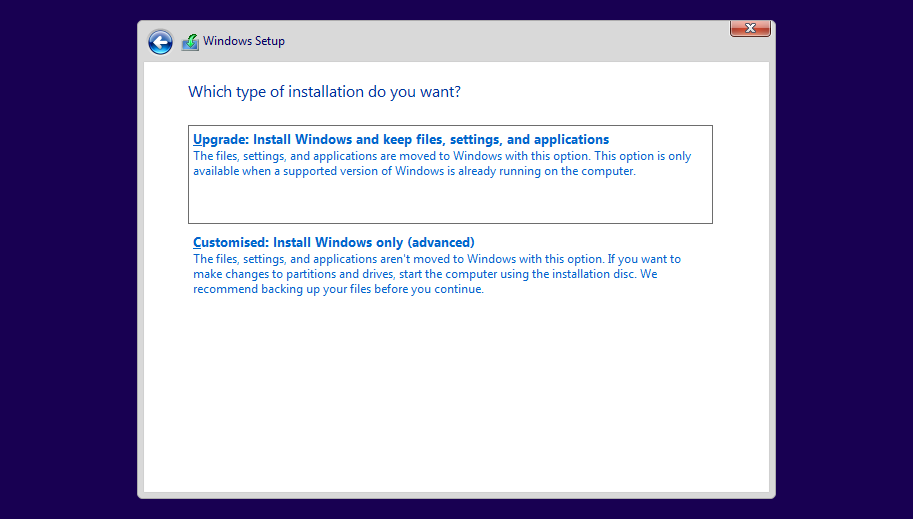
After accepting the licence terms, you will be faced with two options: Upgrade and Customised. The former keeps your files, settings and applications intact – useful when reinstalling to fix a broken operating system, whereas the latter deletes everything to start fresh, also known as a clean install. We are demoing the second option in this instance.
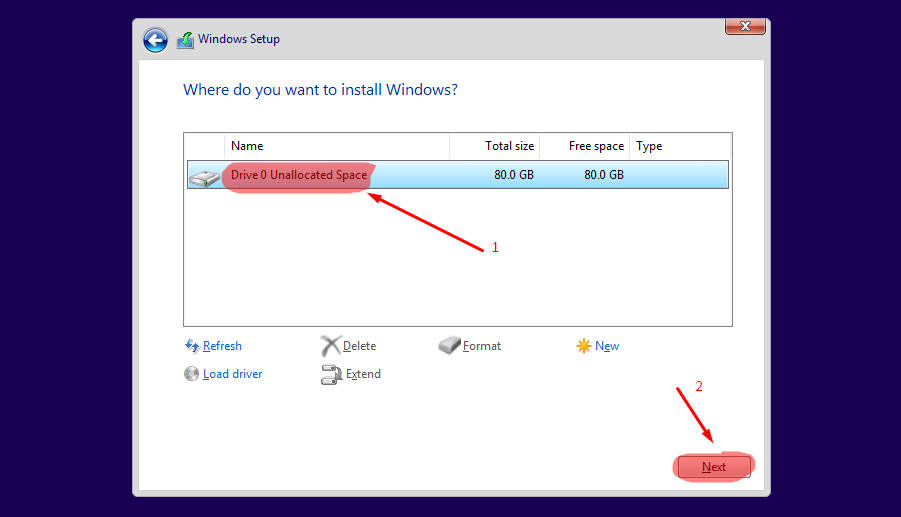
Lastly, choose the drive on which you to want to install Windows 11. Users seeking a full format can choose to delete any existing partitions but remember to make sure you’ve backed up any important data as there’s no going back. Once you are ready to proceed, click Next and the installation wizard will automatically create the required partitions, install Windows 11 and restart your PC.
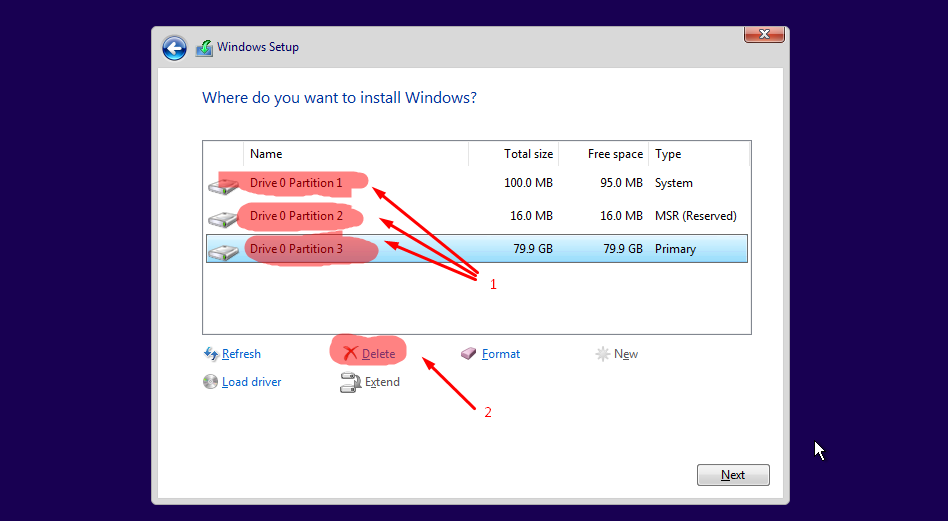
Assuming that your PC has only one drive and that you are opting for a completely fresh start, it’s safe to click on each partition and delete it, resulting in a single ‘Unallocated Space’ onto which Windows 11 will be installed.
Offline account setup
Now here’s the important bit. After initial installation is complete, you will be prompted to configure your system. Select your language and region until you reach the step asking for you to sign in to ‘Unlock your Microsoft experience.’
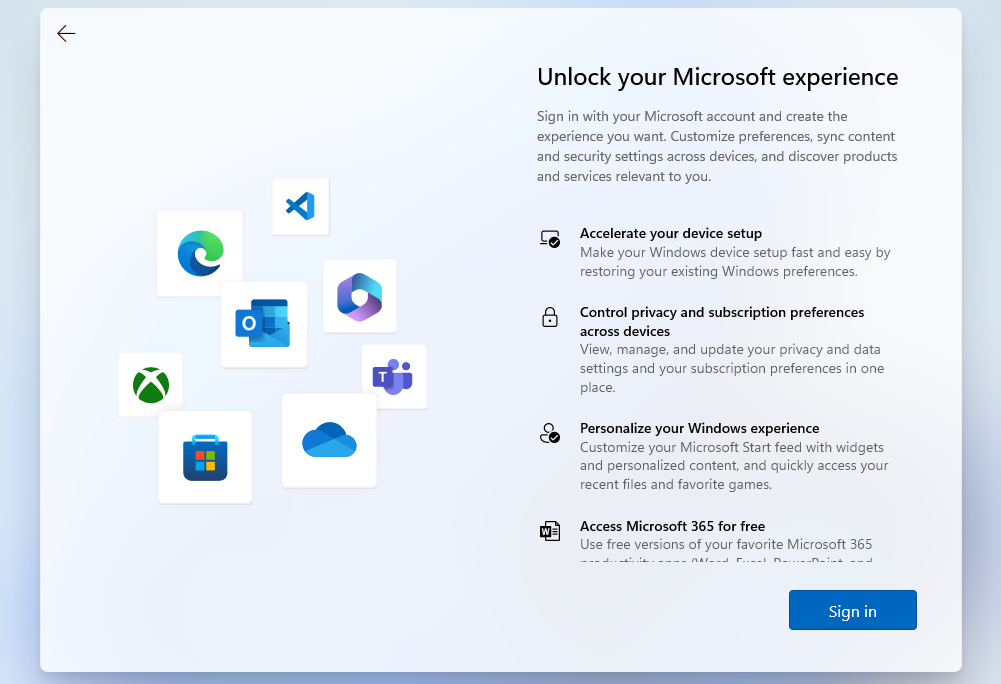
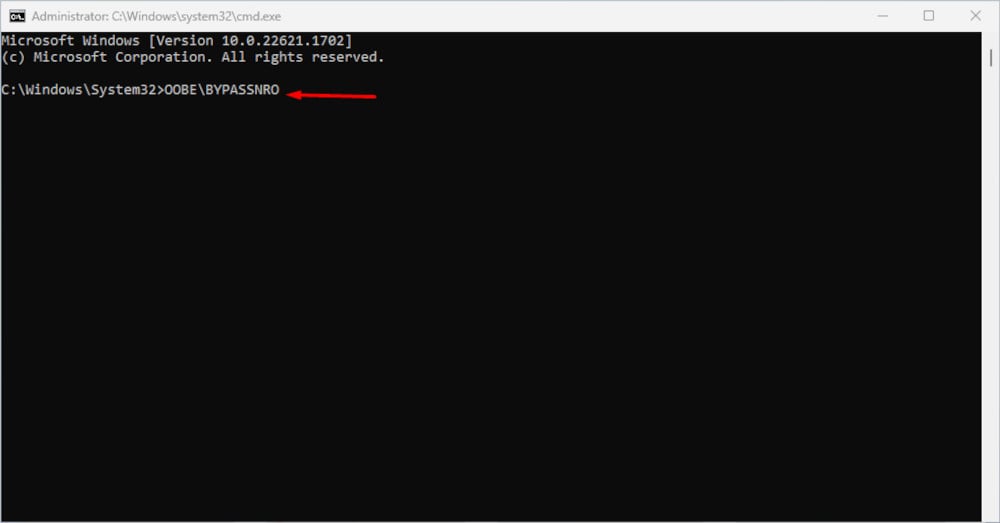
Ensure you are disconnected from the Internet (unplug the Ethernet cable if need be) then press the ‘Shift + F10’ keys at the same time to open a command line window. As pictured below, type ‘OOBE\BYPASSNRO’ and press enter, your computer will restart and allow you to continue without an Internet connection. Side note: nobody seems to know exactly what NRO stands for – our best guess is Network Requirement Override – but it’s a tweak we’re eternally grateful for.
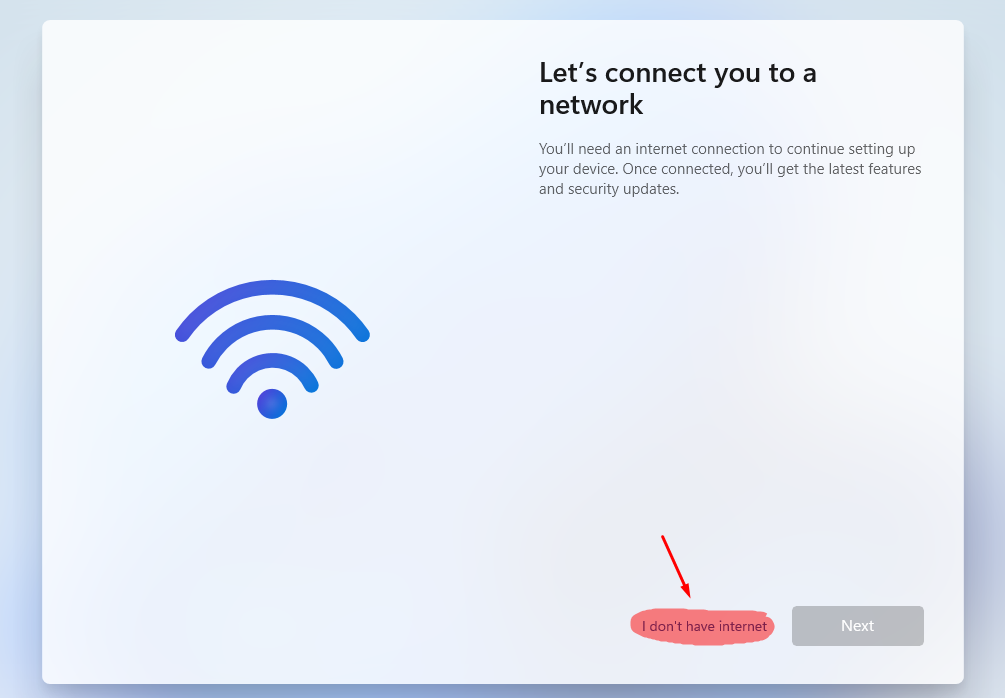
Upon restart, you will now come across an option described as ‘I don’t have Internet’. Click on it to proceed offline.
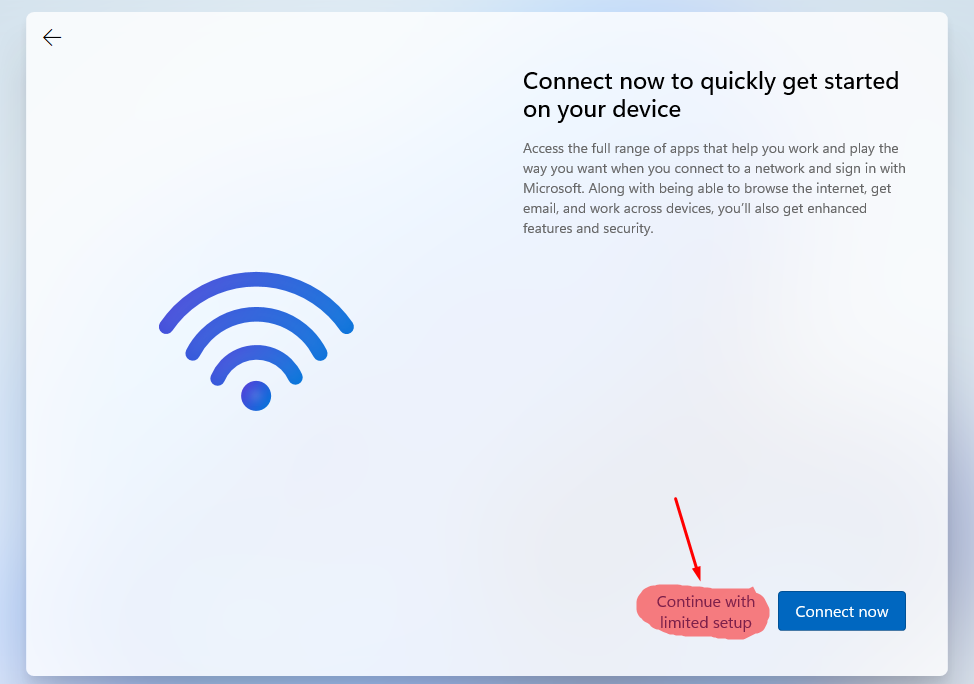
Microsoft will make one last attempt to lure you into creating an account, but choose ‘Continue with limited setup’ on the next page to remain offline. You will then be able to create a local profile and complete installation as intended.
It is astonishing that software as widely used as Windows 11 requires such a modification in order to install without an Internet connection or Microsoft account, but here we are. Nice to know there’s a workaround, wouldn’t you say?
Congratulations, you have now completed an offline installation of Windows 11.


